|
The hardest part for me was getting the windows cut, I tried several ways.
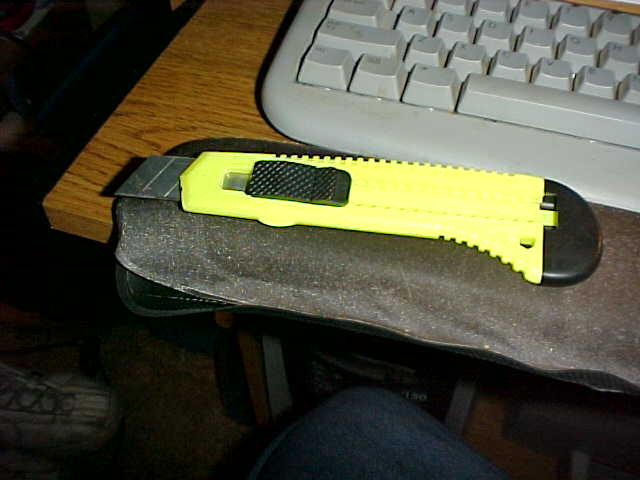
I tried heating up a box cutter with a lighter or candle. It worked but was very slow.
I also used some snips, but it is very slow and if your not very careful you
can easily crack the plastic. When cutting the windows leave at least 3 inches on bottom so shavings don't fall
out. Measure and draw windows with marker. I only put windows on one side, putting windows on both sides may weaken
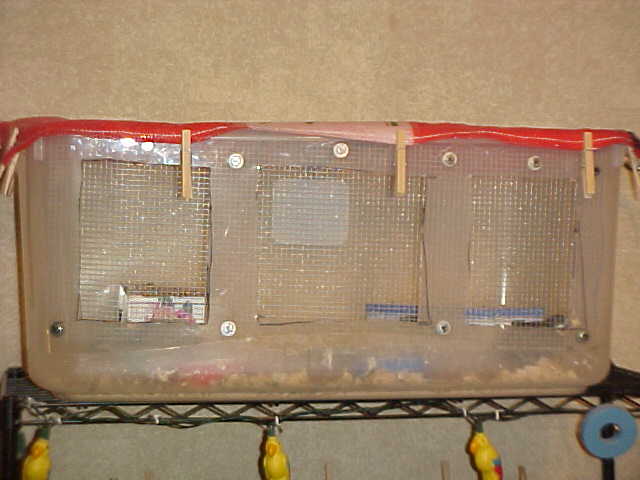
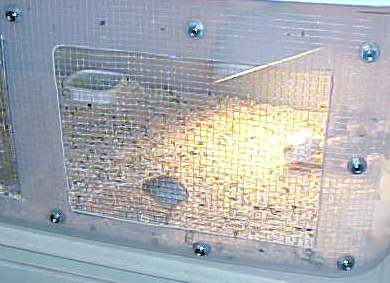
cage. I make two windows--7 1/2 inches tall by 10 1/2 inches wide. Space them at least 2 1/2 inches apart.
The one in the picture has 3 windows, this is the first one I made, after finding out how hard it was to cut out the windows
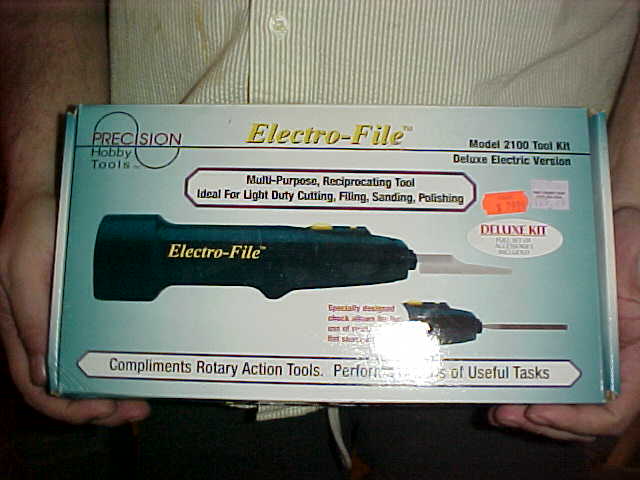
I changed to 2 windows. But we finally did find something that cuts the windows pretty good, following is a picture
of it.
It worked the best by far, but if someone comes up with an even better way, please
email me.
Just remember that it is easy to crack the plastic, so take it slow and easy.
After you have the holes cut you can measure the 1/4 inch hardware cloth, if
you have trouble finding it, email me. Make sure you have at least an inch or more on all sides bigger than the windows,
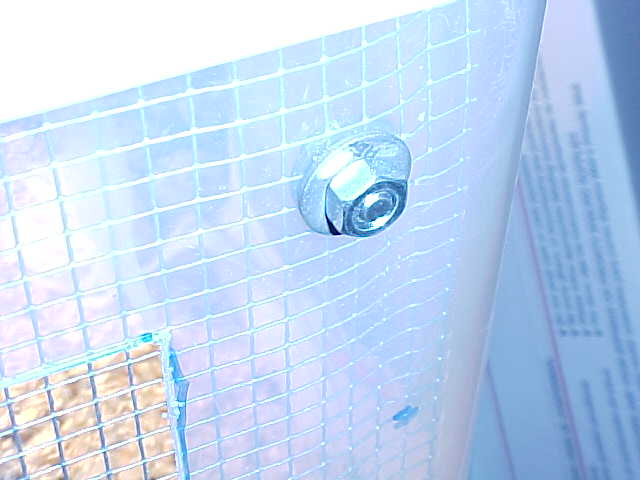
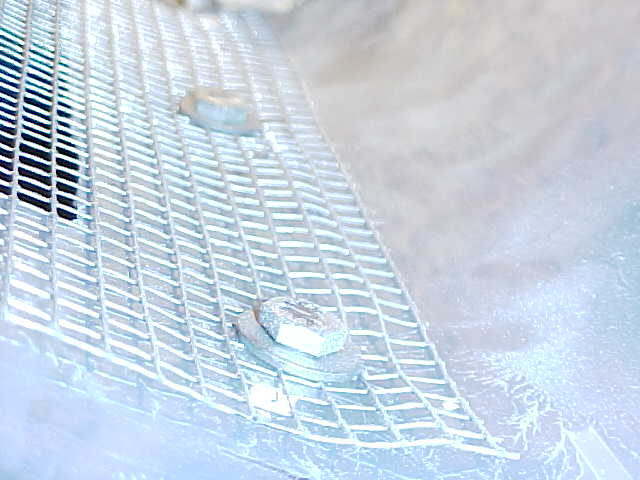
I just use one big piece for both windows. I then use 12--1/4 nuts and bolts with a washer on each side to hold the
hardware cloth in place.
Best way I have found to bolt in the hardware cloth is to hold hardware cloth
in place, use a marker to mark where you will put the first and second bolt, I start in the middle top and bottom. Use
a 1/4 inch drill to make your holes and remember the plastic cracks, so place bolts at least 1 inch from edge of window.
Go a head and put the middle bolts in, I put the hardware cloth on the inside of the container. Make sure there are
no sharp edges sticking up, and snip off all poking wires.
Now with the hardware cloth bolted in the container on the top and bottom middle,
you can mark one side, I put a bolt on the top and bottom middle of window and one on top, bottom and middle of far side end
of window. Then pull hardware cloth back away from window and drill holes. Then bolt. Do same to the other
side.
You may want to use a screw driver or something to make the hardware cloth a
little streched out where you are going to put the bolt, it is a tight fit. Be careful when making the drill holes,
you want to have them lined up good with the hardware cloths little squares.
Click here to email me your ideas and questions.
For the lid I use nylon netting with clothes pins, don't use the cheap ones,
get the good ones. If you are brooding be very careful to not get netting on light. You can place the light so
that it is on the outside of one of the windows, I don't even worry about a lid for the first week and half 2 weeks.
Just keep the light off the plastic and netting, but you can put the light right against the hardware cloth.
|